
boost에서 OpenSSL 사용하기 (2)
빌드된 OpenSSL을 프로젝트 설정에 넣고 다시 빌드해본다.
include를 해야한다.
#include <boost/asio/ssl.hpp>
를 하면 ssl 코드들을 가져온다.
라이브러리 설정에는 빌드된 OpenSSL 폴더의 lib 폴더 경로를 포함시켜줘야한다.
이렇게하고 빌드를 해보니…
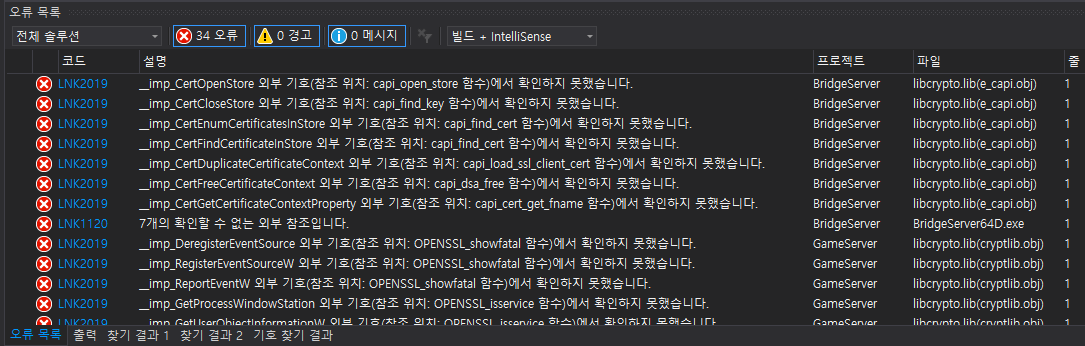
빌드에 오류가 생겼다.
에러 메시지를 구글에 다시 검색해보니,
https://stackoverflow.com/questions/37522654/linking-with-openssl-lib-statically
링크에서 답을 찾을 수 있었다. http://wiki.openssl.org/index.php/Compilation_and_Installation 에 가서 enable-capieng 이라는 옵션에 대해 찾아보라는 얘기였다.
해당 문서에서 enable-capieng 으로 검색해보니
Enables the Microsoft CAPI engine on Windows platforms. Used to access the Windows Certificate Store. Also see Using Windows certificate store through OpenSSL on the OpenSSL developer list.
라는 내용이 있었다.
빌드 옵션에 추가한다.
perl Configure VC-WIN64A --D:\ --openssldir=D:\Library\OpenSSL enable-capieng no-shared no-asm threads
이렇게 하고 다시 openssl을 빌드해본다.
이 옵션으로 해결되지 않아서 -d 옵션 추가. -d 옵션을 추가했더니 nmake 과정에서 알 수 없는 옵션이라는 에러메시지가 나오는 것을 확인했다.
빌드옵션을 변경했다.
perl Configure VC-WIN64A --prefix=D:\Library\OpenSSL --openssldir=D:\Library\OpenSSL --debug no-shared no-idea no-mdc2 no-rc5 no-asm no-capieng threads enable-ssl-trace enable-static-engine
이렇게 빌드했더니 오류가 절반 정도 사라졌다. 나머지 링킹 오류는 라이브러리 파일을 인식하는 위치에서 추가적인 라이브러리 파일을 불러들여야 했다.
.lib 파일을 불러들이는 곳에서 다음을 추가한다. (혹은 프로젝트 설정에서 해도 된다.)
#pragma comment(lib, "advapi32.lib")
#pragma comment(lib, "user32.lib")
#pragma comment(lib, "libcrypto.lib")
#pragma comment(lib, "libssl.lib")
이렇게하고 빌드하니 오류 없이 빌드가 되었다.
참고했던 자료들
- https://github.com/openssl/openssl/blob/OpenSSL_1_1_0-stable/INSTALL
- https://www.lesstif.com/pages/viewpage.action?pageId=6291508
- http://www.programmersought.com/article/8711142745/
- https://github.com/libevent/libevent/issues/59
댓글 남기기